

See what Aomark Writer actually produces.
Switch between three published examples, scroll through the content, and compare each article with verified Google Search Console performance.
Water Damage Behind Baseboards: What Swelling, Stains, and Gaps Can Mean

Swollen, stained, separating, or damp baseboards often mean water has reached more than the painted trim. It may be sitting at the floor-wall joint, soaking the drywall edge, or hiding in the wall cavity behind the trim.
If you see wet baseboards after a bathroom, kitchen, dishwasher, washing machine, or supply-line leak, start small:
- Stop the water source if you can.
- Look for bubbling paint, gaps, soft drywall, musty odor, or stained flooring nearby.
- Press gently along the trim and lower wall. Don’t pry yet if it feels mushy or the leak is still active.
A baseboard can look dry on the surface while cupping, swelling, or paint bubbles point to trapped moisture. For more clues beyond trim, see signs of hidden water damage.
Quick Answer
Swollen, stained, wet, or separating baseboards usually mean moisture has reached the lower edge of the wall. That might be limited to the trim. But it can also mean water is sitting behind the baseboard, soaking into the drywall edge, or trapped inside the wall cavity, which is the hollow space behind the wall surface.
- Stop the water source if you can. Check nearby sinks, toilets, tubs, dishwashers, washing machines, supply lines, exterior walls, basement edges, or slab edges.
- Look for clues around the trim. Watch for paint bubbles, brown stains, gaps between trim and wall, cupping, swelling, or soft drywall just above the baseboard.
- Smell the area. A small stain plus a musty odor is a stronger clue that moisture is hidden behind the trim.
- Press gently near the bottom of the wall. Don’t force it. If the drywall feels soft, crumbly, or damp, stop poking.
- Don’t caulk, repaint, or reinstall trim until the area is confirmed dry.
If the leak is active, the area is widespread, or the wall feels soft, it’s safer to call restoration company before opening more of the wall.
Why Baseboards Reveal Hidden Water Damage
Baseboards are early warning strips because they sit exactly where water likes to settle: the floor-wall joint. If a dishwasher line leaks, a toilet supply drips, or moisture seeps in along a basement slab edge, water often runs behind the trim before you see anything higher on the wall.
Think of the baseboard like the shoreline after a small flood. The wall may look fine at eye level, but the bottom edge can absorb moisture, trap it, and show changes first. Painted trim can also hide wet wood or medium-density fiberboard underneath, so the surface may feel dry while swelling or cupping tells a different story.
| Visible clue | What it can mean | Best next check |
|---|---|---|
| Swollen or cupped trim | Water absorbed into the baseboard | Look for nearby leak sources |
| Gap between trim and wall | Drywall edge or trim has moved | Smell and press gently above it |
| Brown stain near floor | Moisture wicked upward | Check flooring and wall bottom |
| Paint bubbling on trim | Moisture trapped under paint | Don’t repaint until tested dry |
A bathroom leak might leave swollen baseboards and soft drywall at the bottom of the wall. A washing machine leak can send water behind trim on the other side of the room.
Signs Water is Behind the Trim or Drywall
Look for combinations, not just one mark. A single scuff on a baseboard may be normal wear. A small stain plus a musty smell or a new gap at the wall is different. That pattern can mean moisture is sitting behind the trim or soaking into the bottom edge of the drywall.
- Wet or cool trim: Touch the baseboard with the back of your fingers. If it feels damp, cool, or different from nearby trim, check the leak source first.
- Swelling or cupping: A baseboard that bows outward, looks puffy, or has rounded edges after a recent leak may have absorbed water from behind.
- Peeling paint or bubbling: Paint can lift when moisture is trapped under it. Don’t scrape and repaint yet.
- Gaps at the wall or floor: Trim can pull away when drywall, flooring, or the baseboard itself swells.
- Soft drywall above the trim: Press gently, not hard. If it dents easily near the floor, water may have wicked upward.
- Musty odor: A musty smell near one section of trim can point to hidden dampness even if the surface looks dry.
- Stains along basement or slab-edge walls: Brown marks or separating trim can come from moisture collecting where the wall meets the floor.
Should You Remove the Baseboard?
Removing one short piece of baseboard can be useful, but don’t start prying off trim just because you see one stain. The goal is to confirm whether moisture is trapped behind the trim without turning a small inspection into avoidable damage.
Use this quick decision check:
- Leave it in place if the mark is small, dry, and the wall feels firm. Monitor the spot, check for a nearby source, and avoid caulking or painting until you’re confident no moisture is returning.
- Inspect more closely if the baseboard is cupped, swollen, paint is bubbling, or there’s a gap at the wall. Check the nearby floor, the other side of the wall, and any bathroom, kitchen, dishwasher, washing machine, or supply-line connection nearby.
- Remove a small section only if the trim is already loose, wet, or separating and you can do it gently with a utility knife and pry bar. Score the caulk line first so you don’t tear the drywall paper.
- Stop and call a restoration pro if drywall is soft, water is active, the area smells musty, or several feet of trim are affected. Those are stronger hidden-water clues
Drying the Wall Cavity Safely
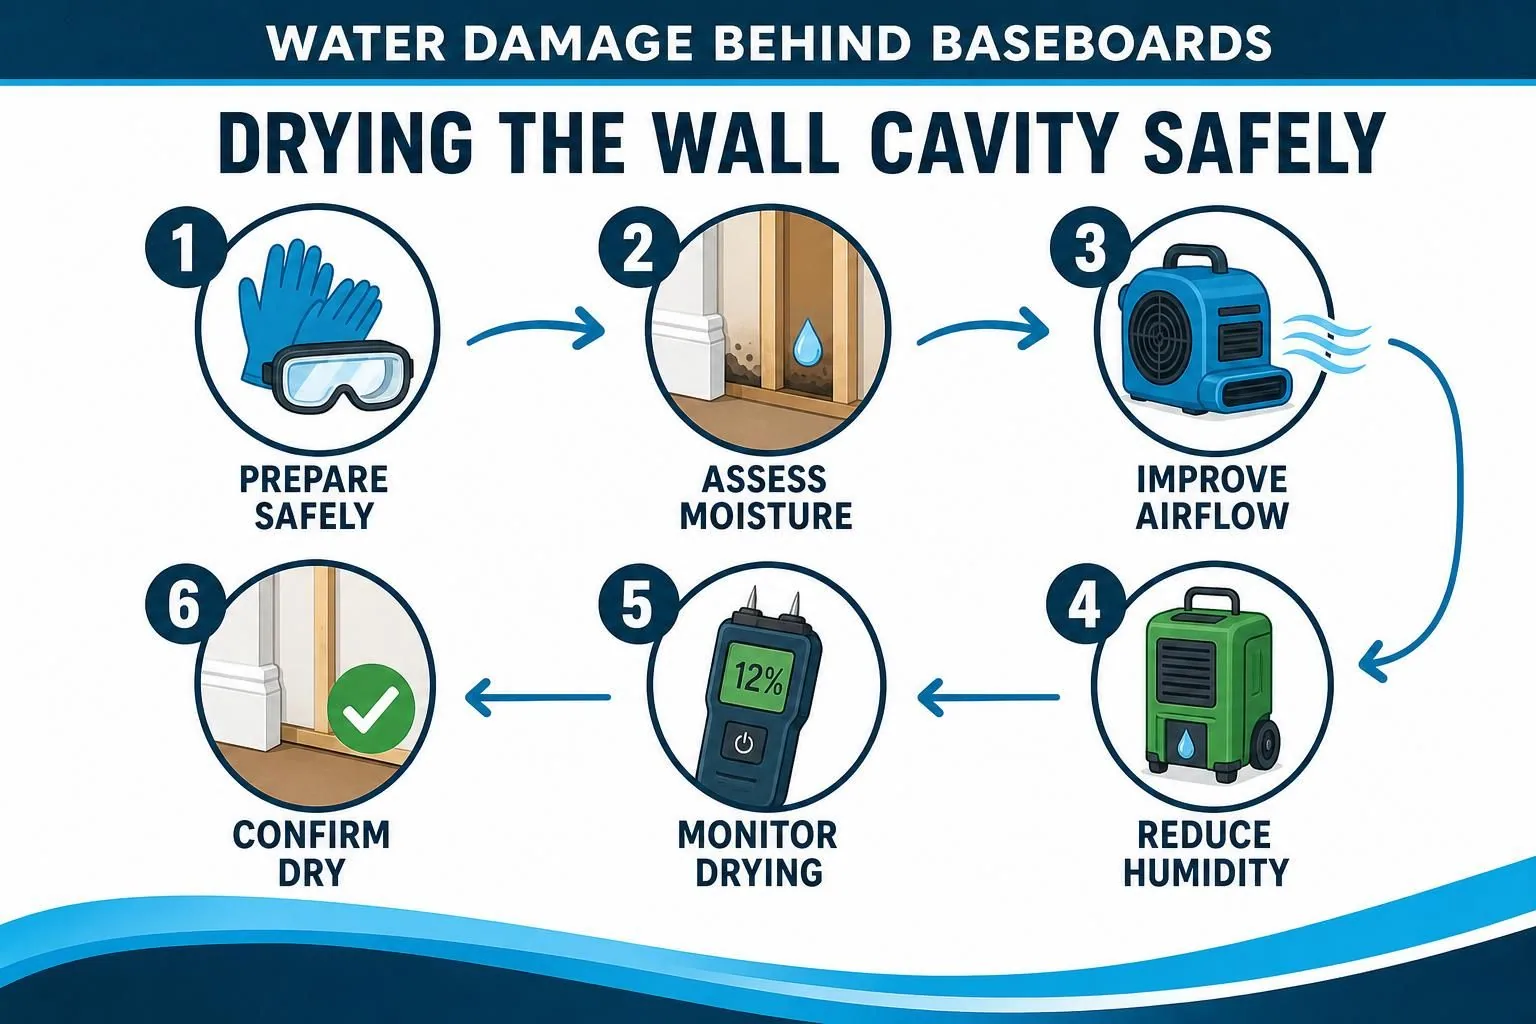
Drying isn’t just “point a fan at the baseboard.” If water has slipped behind the trim, the front surface can feel dry while the drywall edge, bottom plate, or wall cavity stays damp, so knowing how long to dry a wall can help you avoid closing it up too soon.
- Stop the water source first. Shut off the supply valve, stop using the leaking dishwasher or washing machine, or block seepage where it’s safely possible. Drying won’t work while water is still entering.
- Keep the area open if trim was removed. Don’t caulk, repaint, or reinstall the baseboard yet. That can trap moisture inside the wall, like putting a lid on a wet container.
- Use controlled airflow and dehumidification. Air movement helps moisture leave the exposed edge. A dehumidifier pulls that moisture out of the air so it doesn’t settle back into the wall or flooring.
- Check nearby materials. Look at the flooring edge, drywall bottom, and back of the baseboard. Swelling, crumbling drywall, or a musty smell means the problem may be deeper than the trim.
- Call for help if moisture appears widespread. A restoration technician can use moisture meters and drying equipment to check inside the wall without unnecessary demolition.
Mold and Repair Considerations
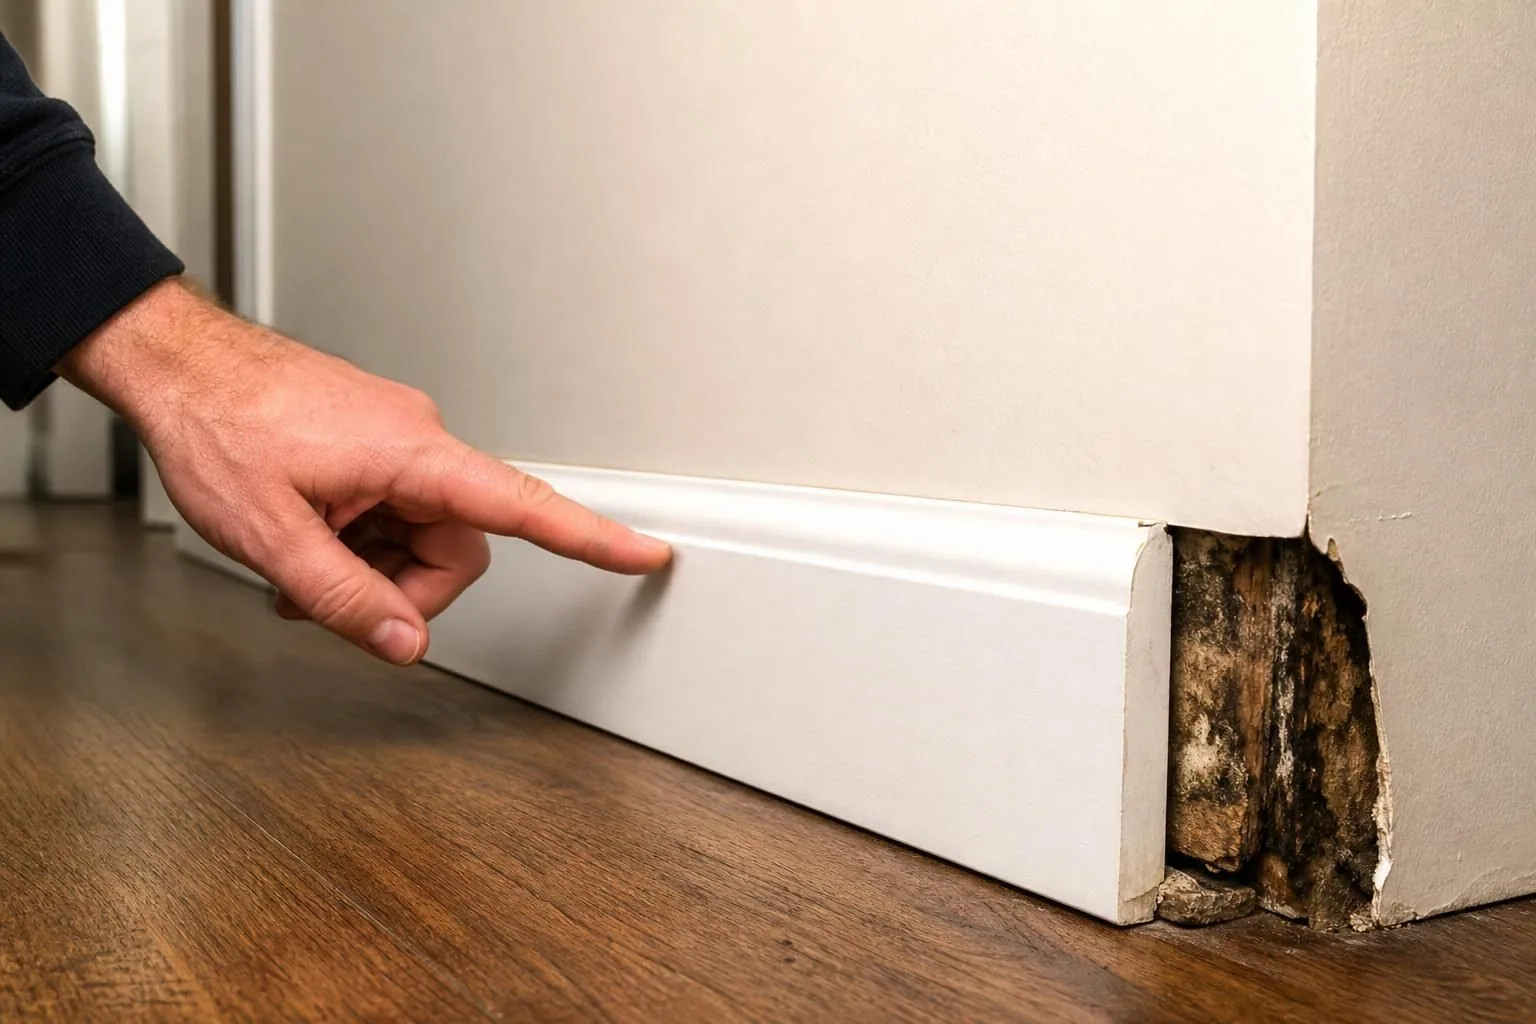
Mold doesn’t automatically appear every time a baseboard gets wet. But trapped moisture behind trim creates the kind of dark, low-airflow space where mold can grow if the area stays damp.
Don’t judge by the front of the baseboard alone. A painted baseboard can feel dry while the back side, drywall paper, or bottom plate inside the wall is still wet. Think of it like a damp towel folded in a drawer: the outside may feel okay, but the inside can stay wet much longer.
Before repairing anything, confirm the area is dry. That means no musty smell, no soft drywall edge, no bubbling paint, and ideally a moisture check with a meter if the leak was more than minor.
Watch for these repair clues:
- Baseboard only: Light staining or slight swelling may mean trim replacement is enough after drying.
- Drywall edge damage: Crumbling, softness, or peeling paper usually means the lower drywall section needs attention.
- Repeated swelling: If the baseboard swells again, the water source probably wasn’t fixed.
Don’t caulk, repaint, or reinstall trim to “seal it up” before moisture is gone. That can trap water inside the wall. For next-step repair planning, see water damage wall repair.
FAQs
Can Baseboards Look Dry but Still Hide Water?
Yes. Paint can feel dry while the back of the trim, the bottom edge of drywall, or the gap behind the baseboard stays damp. Cupping, swelling, bubbling paint, or a musty smell after a leak are better clues than surface touch alone.
Should I Pull Off All the Baseboards?
No. Start small. Check the stain, press gently on the lower wall, smell for mustiness, and look at nearby flooring. If one area is suspicious, removing a short loose section may help you inspect. Stop if drywall crumbles, the trim is heavily swollen, or water keeps appearing.
Can I Just Paint Over Stained Baseboards?
Don’t paint or caulk until the moisture source is fixed and the area is confirmed dry. Covering the stain can trap dampness behind the trim. That’s how a small baseboard issue can turn into hidden drywall or cavity damage.
When Should I Call a Restoration Professional?
Call if the wall feels soft, the leak came from a dishwasher, washing machine, bathroom supply line, basement seepage, or slab edge, or the odor won’t go away. A pro can check moisture behind trim without guessing.
Conclusion
Swollen trim, stains, gaps, bubbling paint, soft drywall edges, or a musty smell all point to the same question: is moisture trapped behind the baseboard? If the mark is small, the wall is firm, and the leak source is fixed, start with a careful visual check and moisture monitoring.
Remove only a short section of trim if you need to inspect safely. Stop and call a restoration professional if the wall is soft, the odor lingers, or the leak involved plumbing, appliances, basement seepage, or a slab edge. The safest next step is to confirm the area is truly dry before repainting, caulking, or reinstalling trim.
Keto dijeta: jelovnik za 7 dana (jednostavan plan obroka + lista za kupovinu)

Ako ti treba keto dijeta jelovnik za 7 dana koji je realan za svakodnevni život, ovde ćeš dobiti baš to: jasna pravila, konkretan plan obroka po danima i listu za kupovinu koja štedi vreme. Ideja ketogene ishrane je da ugljene hidrate svedeš dovoljno nisko da telo pređe na korišćenje masti kao glavnog goriva, uz umeren unos proteina. Zvuči jednostavno, ali detalji prave razliku: koliko ugljenih hidrata je „dovoljno nisko“, kako da ne preteraš s proteinima, šta da jedeš kad si u gužvi i kako da izbegneš klasične greške u prvoj nedelji. Pogledajmo kako da sve to uklopiš bez komplikovanja.
Ovo je za: Ljude koji vole strukturisan plan i žele jednostavan prelaz na ketogenu ishranu bez mnogo računanja svakog zalogaja. Nije idealno ako: Ako imaš medicinska stanja, uzimaš terapiju ili imaš istoriju poremećaja ishrane, bez stručnog nadzora ovo nije dobar izbor. Dobar prvi korak ako: Ako hoćeš da testiraš keto pristup 7 dana uz stabilne obroke i jasnu listu namirnica da smanjiš lutanje. Pozovi stručnjaka ako: Ako osetiš jake simptome, imaš dijabetes, problem sa bubrezima ili si trudna, razgovor sa lekarom je obavezan.
Kratki Pregled
- Ketoza se postiže kada ugljene hidrate držiš nisko, masti visoko, a proteine umerenim.
- Plan od 7 dana je najlakši kad ponavljaš ključne namirnice i menjaš samo priloge i začine.
- Neto ugljeni hidrati su praktičniji za planiranje, ali „skriveni“ ugljeni hidrati u namirnicama često prave problem.
- Prva nedelja traži pažnju na hidrataciju i elektrolite, ne samo na „šta je na tanjiru“.
- Lista za kupovinu i priprema unapred su najveći trik za doslednost bez stresa.
Kako Funkcioniše Keto Dijeta (ukratko)
Keto dijeta funkcioniše tako što značajno smanjuje ugljene hidrate, pa telo pojačano pravi ketone i ulazi u ketozu kao alternativni režim energije. Kada unos ugljenih hidrata padne, nivo insulina obično opada, glikogenske rezerve se troše, a metabolizam se postepeno prebacuje na veće korišćenje masti. To je suština ketogene ishrane: manje ugljenih hidrata, više masti, umereno proteina.
To ne znači da ćeš automatski mršaviti samo zato što si u ketozi. Mršavljenje i dalje zavisi od ukupnog unosa energije i toga da li si u kalorijskom deficitu. Razlika je u tome što mnogima keto pristup olakša kontrolu apetita, stabilizuje osećaj gladi tokom dana i pojednostavi izbor hrane. Ipak, nije magija: ako jedeš više nego što ti treba, vaga može da stoji.
Makronutrijenti su tvoja poluga. Na standardnoj keto dijeti odnos obično ide u korist masti, proteini su umereni, a ugljeni hidrati niski. Masti postaju glavni „nosač“ obroka (maslinovo ulje, puter, kokosovo ulje, avokado), proteini dolaze iz mesa, ribe i jaja, a ugljeni hidrati uglavnom iz povrća sa malo skroba i ponešto bobičastog voća. Poenta je da obroci budu zasitni, jednostavni i ponovljivi, tako da ne razmišljaš o ishrani po ceo dan.
Postoje varijacije. Standardna keto dijeta je najčešća i najlakša za praćenje. Ciljana ketogena dijeta je opcija za ljude koji treniraju intenzivno i žele da određenu količinu ugljenih hidrata tempiraju oko treninga, ali to je finije podešavanje. Za prvih 7 dana, standardni pristup je obično najbolji jer eliminiše previše promenljivih i brže ti pokaže kako reaguješ.
Koliko Ugljenih Hidrata Dnevno (neto Vs. Ukupni)
Za većinu ljudi keto pristup znači držati ugljene hidrate dovoljno nisko da ketoni postanu značajan izvor energije. U praksi, mnogi kreću sa oko 20 do 50 g neto ugljenih hidrata dnevno, pa po potrebi prilagođavaju u zavisnosti od toga kako se osećaju i koliko su aktivni. Najvažnije je da budeš konzistentan i da znaš šta brojiš.
Neto ugljeni hidrati su ukupni ugljeni hidrati umanjeni za vlakna (i, u nekim slučajevima, za određene šećerne alkohole), jer vlakna ne podižu šećer u krvi na isti način. To mnogima olakša planiranje, posebno kad jedeš lisnato povrće, brokoli, karfiol i slične namirnice. Međutim, „neto“ može da zavara ako se previše osloniš na prerađenu hranu sa zaslađivačima i deklaracijama koje ne razumeš.
Praktičan savet: ako ti je cilj jednostavan jelovnik za 7 dana, drži ugljene hidrate uglavnom iz povrća sa malo skroba, izbegavaj šećer i žitarice, i ne oslanjaj se na keto slatkiše da ti nose dan. Tako će i neto i ukupni ugljeni hidrati prirodno ostati niski, bez previše računanja.
Pravila Jelovnika Za 7 Dana (makroi, Porcije I Priprema)
Jelovnik za 7 dana radi najbolje kad unapred postaviš okvir za makroe i porcije, pa ga puniš konkretnim obrocima. U keto ishrani greške najčešće idu u dve krajnosti: pojedeš premalo pa si gladan, ili jedeš „keto“ namirnice u količinama koje ti ne odgovaraju. Okvir je važniji od savršene matematike.

Kreni od proteina, jer najviše utiču na sitost i oporavak, posebno uz trening snage. Drži ih umerenim: dovoljno da čuvaš mišiće, ali bez stalnog dodavanja proteinskih grickalica. Praktičan kriterijum je da svaki obrok ima jednu jasnu porciju proteina, kao meso, riba ili jaja. Ako apetit raste ili teško ostaješ u niskim ugljenim hidratima, proteine drži stabilnim, a masti prilagodi sitosti.
Masti podešavaš prema cilju. Za mršavljenje, ne moraš da dodaješ masnoću na silu kad si već sit. Ako ti fali energije ili su obroci „prazni“, maslinovo ulje, puter, sir ili avokado često pomognu bez dodatnih ugljenih hidrata.
Ugljene hidrate držiš nisko i biraš pametno: lisnato povrće, krastavac, tikvice, pečurke, brokoli, karfiol, paprika u umerenoj meri. Voće svodiš na bobičasto u malim porcijama, ako ti se uklapa.
Za 7 dana je praktično imati 2-3 doručka za rotaciju, 3-4 ručka ili večere koje se lako podgrevaju i jedan plan B. Plan B treba da bude obrok za 5 minuta, uvek dostupan, na primer jaja plus salata plus maslinovo ulje, ili konzerva tune plus majonez plus krastavac. Prvih 7 dana drži pripremu jednostavnom, a kasnije proširi i finije prilagodi.
Kako Da Organizujete Kuvanje Za Celu Nedelju
Najlakši način je da unapred skuvaš bazu proteina i pripremiš povrće koje može brzo da se završi, pa da svaki dan samo sklapaš obroke. To znači manje posuđa, manje odluka i manje šanse da posegneš za hlebom ili testeninom kad ogladniš.
Probaj ovaj raspored pripreme:
- Ispeci ili skuvaj 2 vrste proteina: piletina i mleveno meso, ili losos i ćuretina.
- Skuvaj jaja za 2-3 dana unapred, pa dopunjavaj.
- Operi i naseckaj lisnato povrće, krastavac i papriku, pa čuvaj u kutijama.
- Napravi jedan sos na bazi maslinovog ulja i limuna ili majoneza, da obroci ne budu suvi.
Da ti priprema ne „pojede“ nedelju, smisli i gde šta ide: jedan deo mesa ostavi za salate, drugi za podgrevanje, a deo odmah zamrzni ako znaš da nećeš stići da ga pojedeš u naredna 2-3 dana. Povrće koje pušta vodu (krastavac, salata) bolje je držati odvojeno od dresinga i dodavati ga tek kad jedeš. Tako će obroci ostati sveži i ukusni, a nećeš imati osećaj da jedeš istu stvar sedam puta.
Još jedan trik: začini menjaju sve. Ista piletina može da bude „mediteranska“ uz maslinovo ulje i origano, ili ljuta uz alevu papriku i biber. Tako dobijaš utisak raznolikosti bez novih namirnica i bez rizika da se potkradu ugljeni hidrati.
Keto Dijeta Jelovnik Za 7 Dana (doručak, Ručak, Večera)
Ovaj keto dijeta jelovnik za 7 dana koristi ponovljive namirnice, ali uz dovoljno rotacije da obroci ne dosade. Svaki dan ima doručak, ručak i večeru, a povrće i masnoće podešavaš prema gladi i cilju. Ako ti neki obrok ne leži, zameni ga sličnim iz drugog dana, ali zadrži logiku: proteini umereno, ugljeni hidrati niski, masti prema sitosti. Jelovnik je osnova za prelazak na keto režim i lako se širi na 14 ili 30 dana rotiranjem istih baza.
Dan 1
- Doručak: Omlet sa sirom i spanaćem, uz nekoliko maslina.
- Ručak: Pileća salata sa majonezom, krastavcem i lisnatim povrćem.
- Večera: Losos na puteru, brokoli na pari sa maslinovim uljem.
Dan 2
- Doručak: Jaja na oko, avokado, rukola.
- Ručak: Mleveno meso sa tikvicama i začinima, kašika pavlake.
- Večera: Svinjski vrat ili kotleti, salata od kupusa sa maslinovim uljem.
Dan 3
- Doručak: Punomasni jogurt (nezaslađen) uz malo bobičastog voća i nekoliko oraha.
- Ručak: Tuna salata (tuna, majonez, celer ili krastavac), lisnato povrće.
- Večera: Piletina iz rerne, pire od karfiola sa puterom.
Dan 4
- Doručak: Kajgana sa pečurkama i sirom.
- Ručak: Ćureći file, salata od krastavca i pavlake, šaka semenki.
- Večera: Riba po izboru, tikvice grilovane na maslinovom ulju.
Dan 5
- Doručak: Omlet sa suvim mesom i sirom, paradajz u manjoj meri.
- Ručak: Goveđi burger bez peciva, salata, kašika majoneza.
- Večera: Svinjetina ili junetina u tiganju, zelena boranija u umerenoj porciji.
Dan 6
- Doručak: Kuvana jaja, avokado, maslinovo ulje preko salate.
- Ručak: Pileće batake, kupus salata, malo sira.
- Večera: Jaja u sosu od pavlake i sira, spanać ili blitva.
Dan 7
- Doručak: Punomasni jogurt (nezaslađen) sa semenkama i cimetom.
- Ručak: Salata sa lososom ili tunom, maslinovo ulje, limun.
- Večera: Mleveno meso u sosu od paradajza u maloj meri, uz tikvice ili karfiol.
Ako se pitaš gde je „keto hleb“, poenta prvih 7 dana je da stabilizuješ navike i apetit bez imitacija. Kad rutina legne, tek onda eksperimentiši sa receptima.
Opcije Za Užinu I Brze Zamene
Užina na keto dijeti nije obavezna, ali je korisna kad znaš da ćeš imati dugačak razmak između obroka. Najbolje užine imaju malo ugljenih hidrata, dovoljno proteina ili masti i ne pokreću grickanje bez kraja. Bitna je i praktičnost, da može da stoji u torbi ili frižideru bez posebne pripreme. Tada je manja šansa da posegneš za bilo čim.
Dobre opcije:
- Kuvana jaja sa solju.
- Sir i nekoliko maslina.
- Šaka orasastih plodova ili semenki (porcija, ne cela kesica).
- Avokado sa limunom i solju.
- Štapići krastavca uz namaz od pavlake i začina.
- Komadi piletine od prethodnog dana.
Ako želiš nešto slatko bez komplikovanja, najjednostavnije je punomasni jogurt sa cimetom i malom porcijom bobičastog voća. Alternativa je nekoliko kockica tamne čokolade sa minimalno dodatog šećera, ako ti ne pojačava apetit. Za zaslađivače važi pravilo: ako ti otvaraju apetit, preskoči ih bar u prvoj nedelji.
Brze zamene kad nemaš plan:
- Umesto testenine: tikvice kao rezanci ili karfiol kao prilog.
- Umesto pirinča: sitno seckani karfiol kratko propržen.
- Umesto slatkiša: malo bobičastog voća uz punomasni jogurt, ako ti se uklapa.
Ako užina stalno mora da bude, obroci su često premali ili ti fali natrijum, pa probaj da povećaš porciju proteina i masti za glavni obrok i dodaj malo soli ili čorbe od kostiju.
Lista Namirnica Za Kupovinu Za 7 Dana
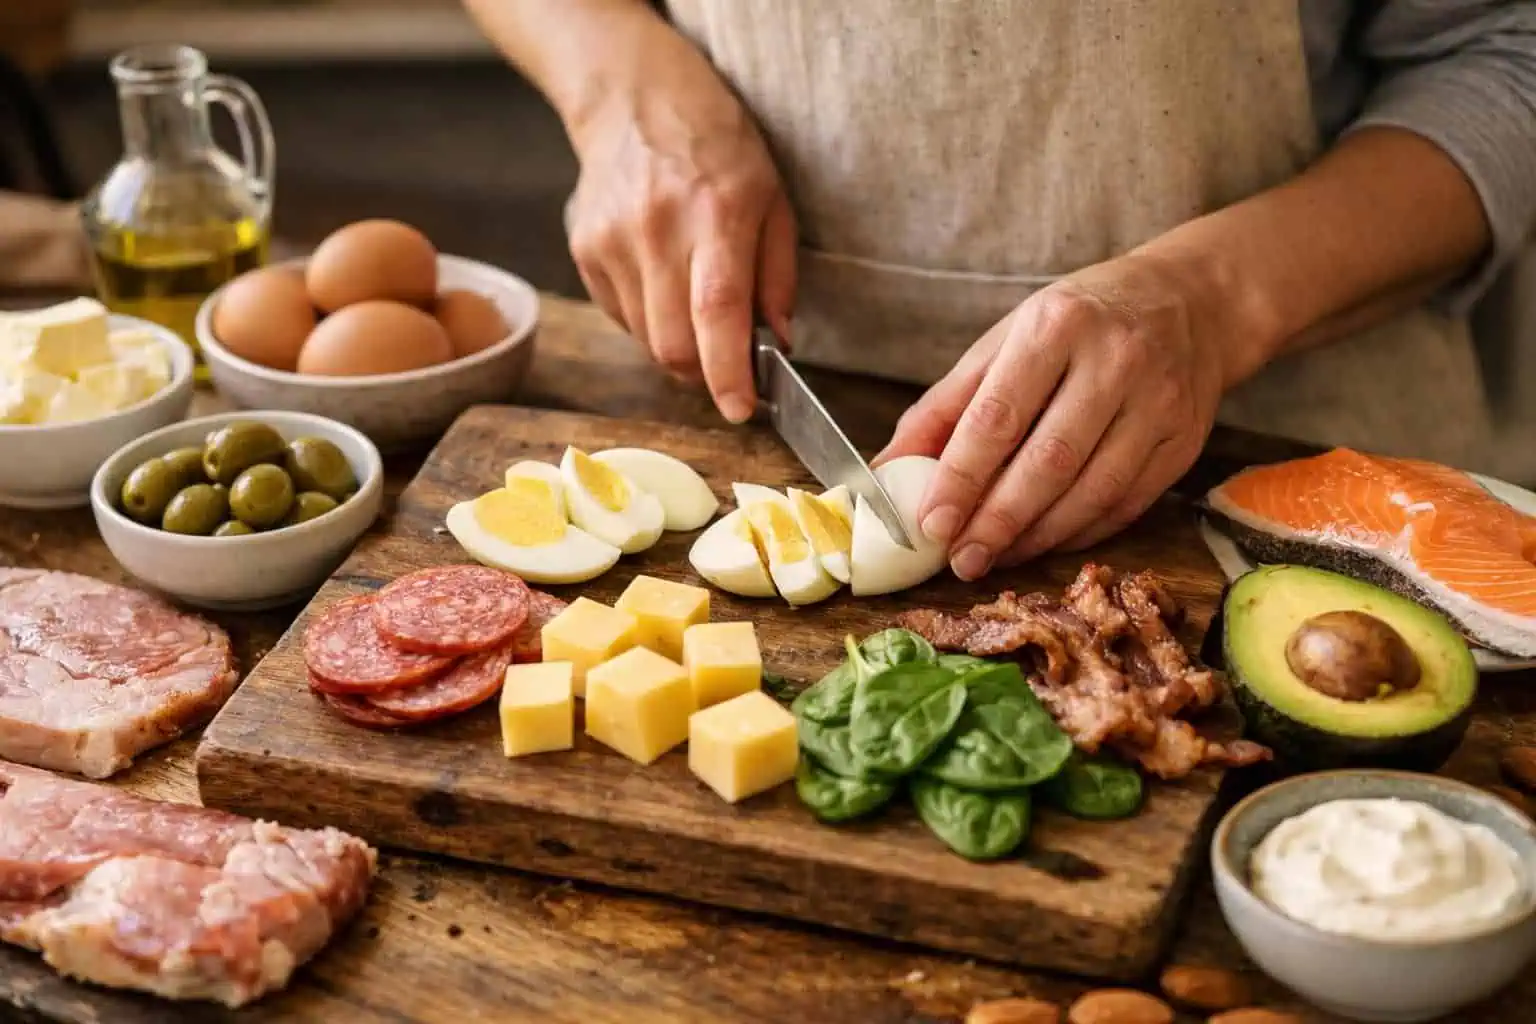
Lista namirnica za kupovinu za 7 dana treba da bude kratka, ponovljiva i da pokrije obroke bez posebnih odlazaka do prodavnice. Cilj je da imaš dovoljno proteina, masti i povrća sa malo skroba, plus par dodataka koji prave razliku u ukusu i sitosti. Ako kupiš „sve keto stvari“, lako ćeš završiti sa gomilom proizvoda koje ne koristiš i sa previše grickalica koje te vuku na prejedanje.
Proteini (izaberi kombinaciju):
- Jaja.
- Piletina (bataci, belo meso).
- Mleveno meso (junetina, svinjetina ili mešano).
- Riba (losos, sardina, skuša, tuna).
- Ćuretina ili svinjski kotleti.
- Suvo meso u umerenoj meri (pazi na dodat šećer).
Povrće sa malo skroba:
- Lisnato povrće (spanać, rukola, zelena salata).
- Brokoli, karfiol.
- Tikvice, krastavac.
- Pečurke.
- Kupus.
- Paprika (umereno).
Masti i mlečno:
- Maslinovo ulje, puter, kokosovo ulje.
- Sir (tvrdi i krem), pavlaka.
- Punomasni jogurt bez dodatog šećera.
- Majonez (proveri sastav).
Ostalo:
- Avokado.
- Orasasti plodovi i semenke (orasi, bademi, suncokret, bundeva).
- Bobičasto voće (manje pakovanje).
Ako ti je cilj da sve pojednostaviš, kupi manje različitih stvari, ali kvalitetnije. Još jedan praktičan savet je da uzmeš „rezervu“ koja te spašava kad ti ponestane svežih namirnica: konzervu tune ili sardine, malo majoneza i par krastavaca. Uzmi i dovoljno soli. U prvoj nedelji to često bude razlika između „osećam se super“ i „nešto mi nije kako treba“.
Osnovne Namirnice + Dodaci (začini, Ulja, Mlečni)
Dodaci su ono što čini da jelovnik ostane ukusan bez dodatnih ugljenih hidrata. Ne treba ti deset sosova, treba ti nekoliko sigurnih kombinacija koje uvek rade.
Začini i dodaci:
- So, biber, aleva paprika.
- Beli luk u prahu ili svež (umereno).
- Origano, bosiljak, timijan.
- Senf bez dodatog šećera.
- Sirće i limun za dresinge.
Ulja i masti:
- Maslinovo ulje za salate i završnicu.
- Putter za termičku obradu i sosove.
- Kokosovo ulje ako ti prija ukus, ali nije obavezno.
Mlečni proizvodi:
- Pavlaka i krem sir za brze umake.
- Tvrdi sirevi za sitost.
- Punomasni jogurt kao „brzi obrok“ uz semenke.
Pazi na „nevidljive“ ugljene hidrate: neki mlečni proizvodi i gotovi sosevi mogu da imaju dodat šećer ili skrob. Ako si početnik, jednostavniji sastav znači manje iznenađenja.
Dozvoljene I Zabranjene Namirnice (najčešće Dileme)
Dozvoljene namirnice na keto dijeti su one koje prirodno imaju malo ugljenih hidrata, dovoljno masti ili proteina, i ne guraju te u stalne oscilacije gladi. Zabranjene namirnice su uglavnom one bogate skrobom i šećerom, jer te najbrže izbace iz onoga što pokušavaš da postigneš. Zvuči grubo, ali u praksi je oslobađajuće: znaš šta je „da“, a šta je „ne“.
Dozvoljeno (osnova):
- Meso, riba, jaja.
- Povrće sa malo skroba, posebno lisnato povrće.
- Punomasni mlečni proizvodi (sir, pavlaka, punomasni jogurt bez šećera).
- Maslinovo ulje, puter, kokosovo ulje.
- Avokado, masline.
- Orasasti plodovi i semenke (u porcijama).
- Bobičasto voće u malim količinama.
Zabranjeno ili za izbegavanje:
- Žitarice i proizvodi: hleb, testenina, peciva.
- Pirinač, krompir, kukuruz.
- Šećer i klasični slatkiši.
- Zaslađeni sokovi i većina alkoholnih pića.
- Većina „dijetalnih“ grickalica sa skrobom.
Najčešće dileme:
- Voće: većina voća je previše bogata šećerom za početak, zato se drži bobičastog voća i male porcije.
- Mahunarke: imaju proteina, ali i dosta ugljenih hidrata, pa ih većina ljudi preskače u prvoj fazi.
- Mleko: obično ima više ugljenih hidrata nego što očekuješ, pa su pavlaka i punomasni jogurt praktičniji.
- Zaslađivači: neki ljudi ih dobro podnose, neki ne. Ako ti pojačavaju apetit, bolje ih izbegni bar prvih 7 dana.
Šta ovo znači u praksi? Ako tanjir praviš od proteina + povrća sa malo skroba + masnoće, bićeš na sigurnom bez stalnog brojanja.
Najčešće Greške I Kako Da Ih Izbegnete (posebno Prvih 7 Dana)
Najčešće greške na keto dijeti u prvih 7 dana su premalo elektrolita i tečnosti, „skriveni“ ugljeni hidrati i loše podešeni proteini i masti. Mnogi misle da je problem u volji, a zapravo je problem u podešavanju. Dobra vest je da se većina toga popravi za par dana kad znaš šta radiš.
Greška 1: Ugljeni hidrati „se provuku“. To se desi preko soseva, gotovih preliva, suhomesnatih proizvoda sa dodatim šećerom, pa i preko prevelikih porcija orašastih plodova. Rešenje: drži se jednostavne hrane i čitaj sastav kad kupuješ prerađeno.
Greška 2: Previše proteina ili premalo proteina. Ako preteraš s proteinima, nekima to smeta u energiji i apetitu, a ako ih ima premalo, glad te pregazi. Rešenje: neka svaki obrok ima jasnu porciju proteina, umesto da se oslanjaš na sir kao jedini „nosilac“.
Greška 3: Dodaješ masti „na silu“. Nije cilj da piješ ulje da bi bio „pravi keto“. Masti su alat za sitost i energiju. Rešenje: dodaj masnoću kad ti treba, smanji kad si već sit, posebno ako ciljaš deficit.
Greška 4: Nemaš plan za socijalne situacije. Poziv na ručak, put, sastanak, i eto hleba. Rešenje: imaj sigurnu opciju koju možeš svuda, na primer jaja, sir, meso i salata, ili meso bez priloga uz dodatnu salatu.
Greška 5: Očekuješ da se osećaš isto od prvog dana. Telo se adaptira, pa prvih dana možeš imati nižu energiju. Rešenje: uspori, spavaj, hidriraj se i ne diži intenzitet treninga baš tada.
Česta greška je i da ljudi zaborave povrće jer su fokusirani na meso i sir. To kratkoročno deluje lako, ali često donosi zatvor, umor i težinu. Rešenje: u ručak ili večeru ubaci veću porciju povrća sa malo skroba i začini masnoćom koja ti prija. Ako se apetit smiri i lakše držiš deficit bez gladi, na dobrom si putu. Prve promene se često vide kao bolja kontrola obroka i manje razmišljanja o hrani.
Elektroliti, „keto Grip“ I Hidratacija
„Keto grip“ najčešće nije misterija, nego kombinacija gubitka tečnosti i elektrolita kad smanjiš ugljene hidrate. Kada glikogen opada, često opada i vezana voda, pa možeš osetiti glavobolju, slabost, vrtoglavicu, grčeve ili razdražljivost. Dehidratacija ume da se maskira kao glad.
Najpraktičnije stvari koje pomažu:
- Povećaj unos tečnosti tokom dana.
- Dodaj natrijum: posoli hranu, razmisli o supi ili bujonu.
- Obrati pažnju na kalijum i magnezijum kroz hranu (lisnato povrće, avokado, semenke), a suplementi imaju smisla samo ako ti zaista trebaju.
Korisno je i da razlikuješ dva signala: „pada mi energija“ i „stvarno sam gladan“. U prvoj nedelji, kratka pauza, čaša vode i malo soli uz obrok nekad reše ono što si mislio da je napad gladi. Ako treniraš, budi posebno pažljiv posle znojenja, jer tada lakše osetiš grčeve ili glavobolju.
Zatvor se takođe često javi kad ljudi smanje povrće i vlakna. Rešenje nije „još sira“, nego više povrća sa malo skroba, dovoljno vode i, po potrebi, magnezijum. Ako simptomi postanu jaki ili traju, to je signal da nešto treba promeniti, a ne da se gura kroz zid.
Bezbednost I Kome Keto Ne Prija (kada Da Se Posavetujete Sa Lekarom)
Keto dijeta nije za svakoga i najpametnije je da pre početka proceniš da li imaš razloge za oprez ili medicinski nadzor. Posebno je važno ako imaš dijabetes, koristiš terapiju koja utiče na šećer u krvi ili insulin, imaš bolesti bubrega ili jetre, probleme sa žučnom kesom, ili si trudna ili dojiš. U tim slučajevima, promene u ishrani mogu da traže prilagođavanje terapije i praćenje, pa je razgovor sa lekarom pre početka razuman korak.
Ako imaš istoriju poremećaja ishrane, stroga pravila i restrikcije mogu biti okidač. Tada je bolje birati pristup koji je fleksibilniji i koji se radi uz podršku stručnjaka.
Ako si vrlo aktivan i radiš intenzivan trening snage ili izdržljivosti, moguće je da će ti standardna keto dijeta biti u redu, ali nekima više prija ciljana ketogena dijeta gde ugljene hidrate tempiraš oko treninga. Ipak, to nije prvi korak. Prvo savladaj osnovu, prati energiju, oporavak i apetit, pa tek onda razmišljaj o varijacijama. Ako ti je bitna mišićna masa, umereni proteini, dobar san i pametno doziranje treninga su praktično važniji od „savršene“ keto matematike, a većina ljudi ne gubi mišiće ako ima stabilan unos proteina i radi trening snage.
Znaci da treba da prekineš i javiš se lekaru uključuju uporne vrtoglavice, nesvesticu, jake palpitacije, konfuziju, pogoršanje hroničnih simptoma ili bilo šta što deluje „ne kao obična adaptacija“. Bolje je proveriti nego nagađati.
Zaključak
Ako želiš stabilan početak bez previše komplikovanja, drži se jednostavne formule: proteini umereno, ugljeni hidrati niski, masti prema sitosti, plus fokus na hidrataciju i elektrolite. Zatim koristi ponovljive obroke i spisak za kupovinu da ti odluke ne pojedu energiju. Kada tako postaviš temelje, keto dijeta jelovnik za 7 dana postaje praktičan alat, ne projekat koji traje ceo dan. Sledeći korak je da izabereš 2-3 omiljena doručka i 3-4 ručka/večere iz plana, pripremiš bazu namirnica i pratiš kako ti telo reaguje u prvoj nedelji.
Montažne garaže: vrste, cene, dimenzije i šta da proverite pre kupovine

Montažne garaže su super rešenje kad hoćeš brzo da dobiješ zatvoren prostor za auto, alat ili stvari, bez dugog gradilišta i velikih radova. Dobra vest je da danas možeš da biraš između više materijala, krovova i vrata, pa garaža stvarno može da se uklopi u tvoje dvorište i budžet. U ovom vodiču prolazimo kroz montažne garaže od početka do kraja: koje vrste postoje, koje dimenzije imaju smisla, šta najviše diže cenu i šta obavezno treba da proveriš pre kupovine, da posle ne bi bilo neprijatnih iznenađenja.
Najbolje za: Dvorišta gde ti treba brza, uredna zaštita auta i stvari, bez dugog čekanja i velikih građevinskih radova.
Nije idealno kada: Parcela je strma, podloga je loša ili ti treba prostor koji mora da bude stalno topao i potpuno tih.
Dobar prvi korak ako: Izmeriš prostor, proveriš prilaz za transport i jasno napišeš listu šta ti je važno: dimenzije, vrata, krov, izolacija.
Pozovite stručnjaka ako: Teren je neravan, vetar je jak u tvom kraju ili ti treba ozbiljan temelj i sigurno ankerisanje.
Kratki Pregled
- Montažna garaža se najviše isplati kad ti treba brz i čist način da dobiješ zatvoren prostor.
- Lim je lakši i obično jednostavniji, dok sendvič paneli daju bolju izolaciju i komfor.
- Prava veličina nije samo „da auto stane“, već i da možeš normalno da otvoriš vrata i odložiš opremu.
- U ponudi su često konstrukcija, oplata i osnovna vrata, dok su temelj i dodatna oprema česte doplate.
- Podloga i nivelacija terena su pola posla, jer od toga zavisi stabilnost i trajnost.
Šta Su Montažne Garaže I Kome Se Isplate
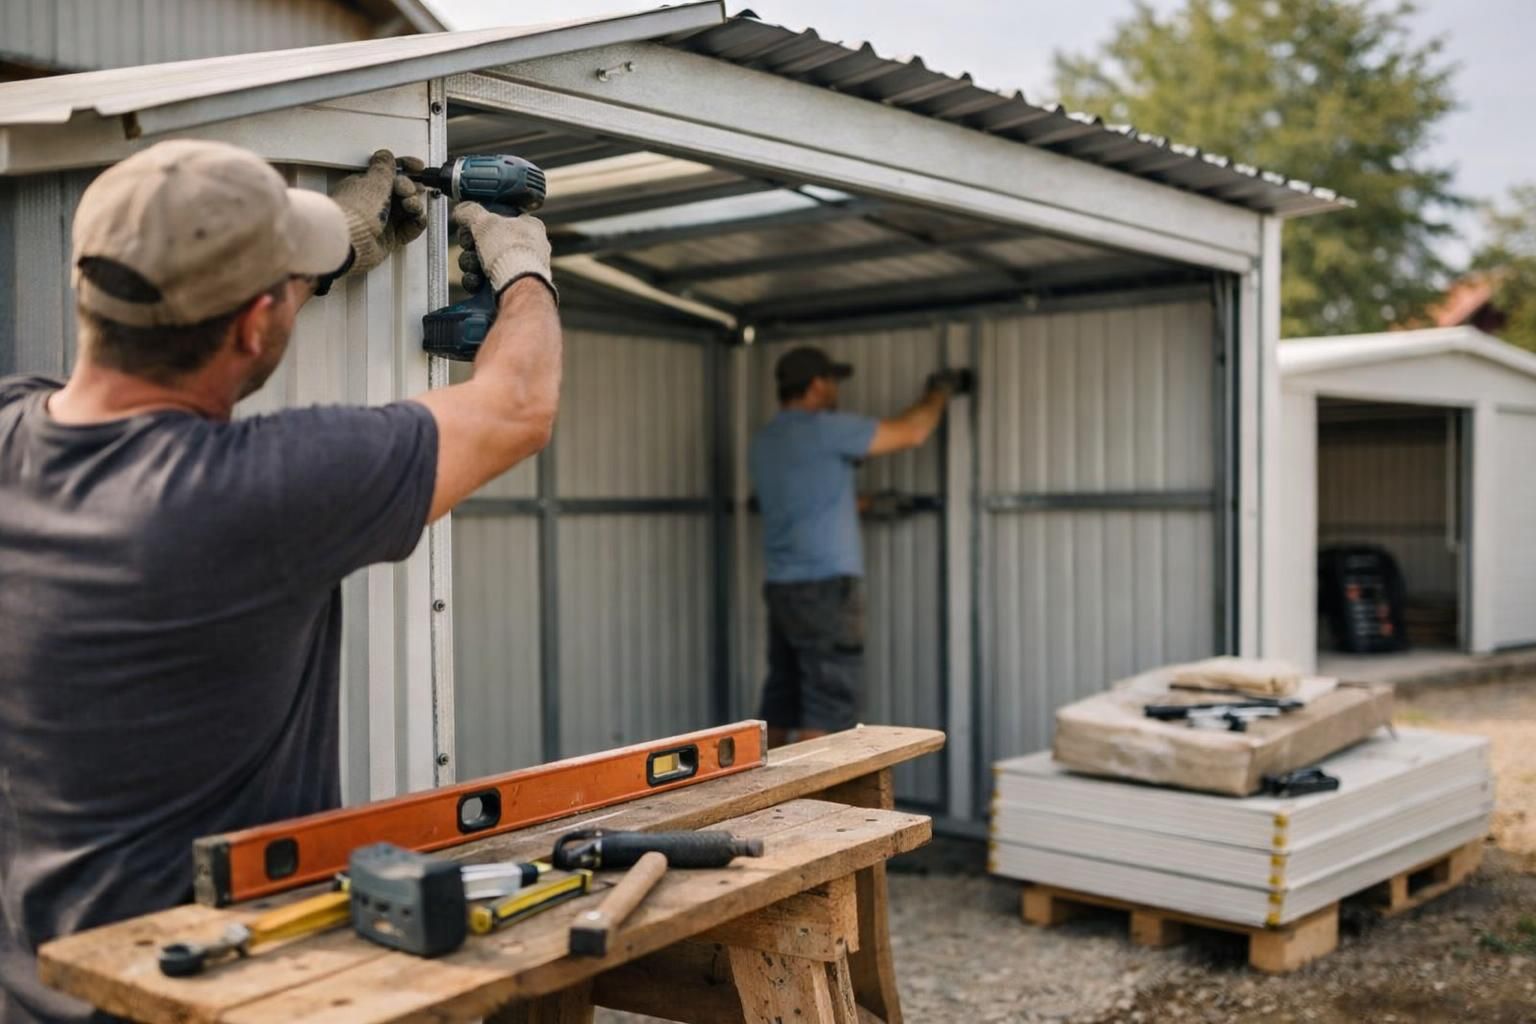
Montažne garaže su gotove metalne konstrukcije koje se dovezu i sklope na placu. Najčešće su od čeličnih profila, a oblažu se limom ili panelima. Isplate se kad želiš brz dogovor i uredan rezultat bez zidanja. Pogodne su za auto, alat i ostavu. Ako nema mesta, razmotri auto nadstrešnica kao privremeno rešenje.
Vrste Montažnih Garaža (lim, Sendvič Paneli, Kombinacije)
Najčešće ćeš birati između limene garaže, izolovane garaže od sendvič panela ili kombinacije ta dva rešenja. Lim je jednostavniji i lakši, sendvič panel daje bolju zaštitu od hladnoće i toplote, a kombinacije umeju da budu praktične kad hoćeš balans.
Pre kupovine traži specifikaciju proizvoda i sadržaj paketa, da bude jasno šta tačno dobijaš: konstrukciju, oplatu, vrata, okove, bravu, šarke, zaptivke i slično. Tako ćeš lakše uporediti ponude, bez „sitnih slova“. Dodatni plus je ako dobiješ jasne instrukcije za održavanje i uslove garancije.
Limene (trapezni/profilisani Lim)
Limene garaže se najčešće rade od trapeznog, odnosno profilisanog lima, koji je lagan i brzo se montira. Dobre su za osnovnu zaštitu auta i stvari, ali računaj da bez izolacije unutra lakše bude hladno zimi i vruće leti. Obrati pažnju na kvalitet spojeva, šrafove i zaptivke.
Izolovane (sendvič Paneli)
Izolovana garaža od sendvič panela ima sloj izolacije između limova, pa unutra bude prijatnije i stabilnije. To je odlična opcija ako držiš alat, boje, mašine ili osetljivu opremu, jer manje „radi“ kondenzacija. Bitno je da paneli budu lepo uklopljeni, a ventilacija planirana makar osnovno.
Standardne Dimenzije I Kako Izabrati Pravu Veličinu
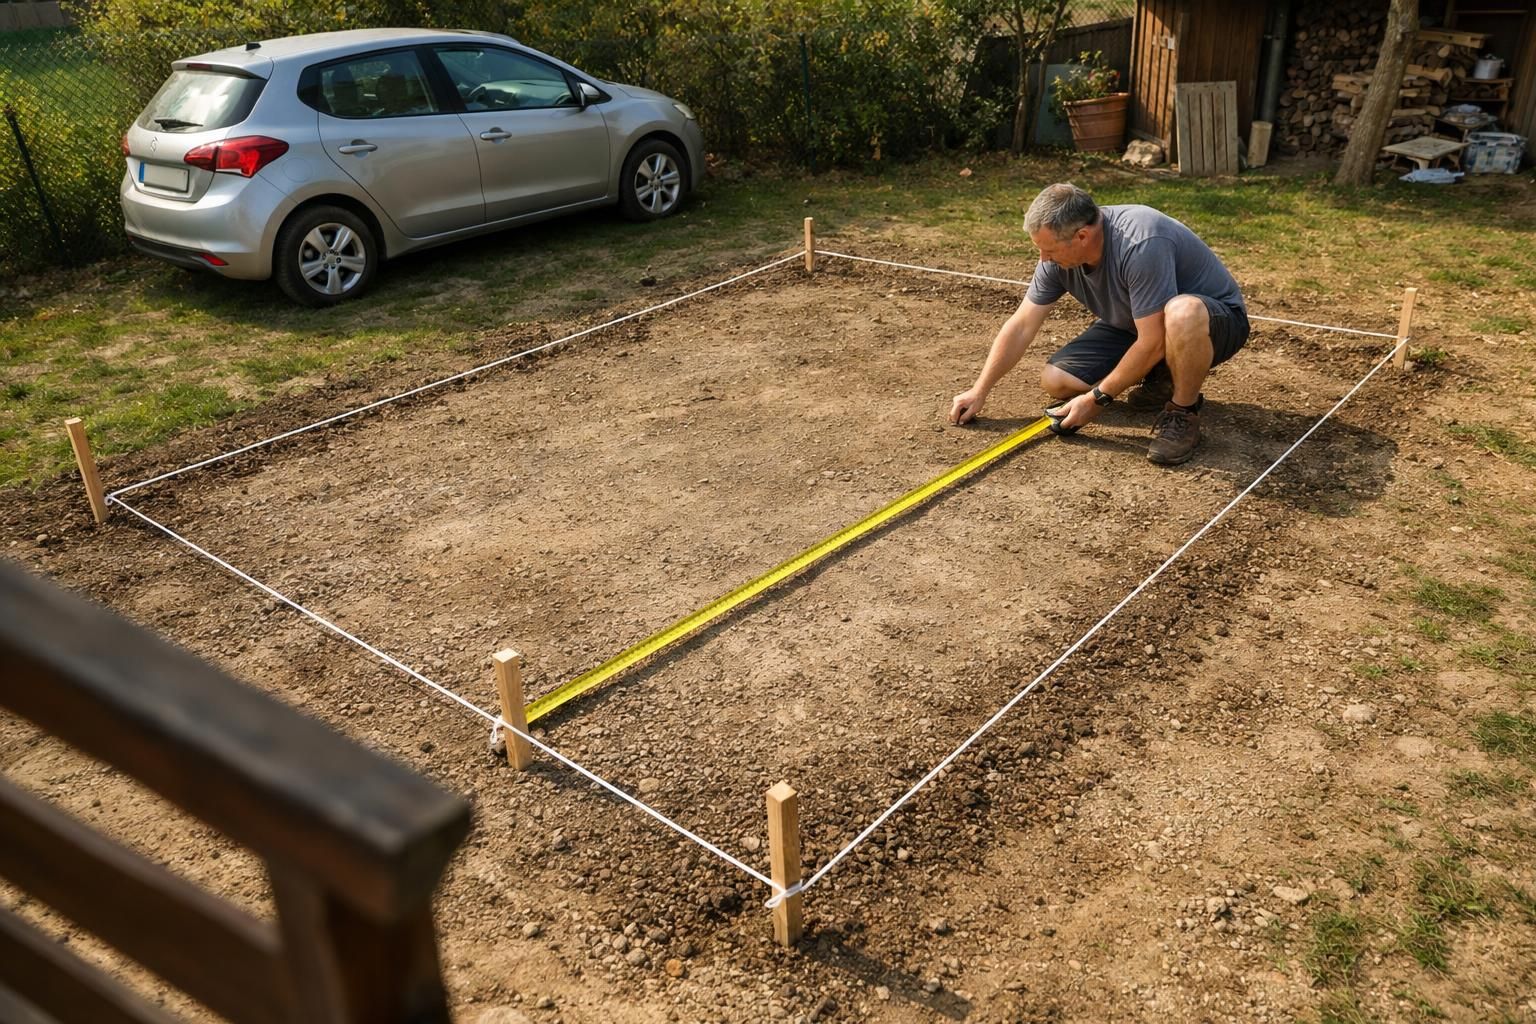
Prava veličina je ona u kojoj možeš da parkiraš i izađeš bez udaranja vratima. Bitne su širina, dužina i visina, ali komfor najviše zavisi od prostora uz auto i za odlaganje. Popiši šta ulazi: gume, alat, police, merdevine. Ako imaš viši auto ili krovni kofer, proveri visinu i tip krova. Uzmite malo veću ako planiraš proširenje.
Garaža Za 1 Auto, 2 Auta I „duža“ Za Radionicu/skladište
Garaža za 1 auto treba da ima dovoljno širine da otvoriš vrata bez nerviranja, dok garaža za 2 auta traži dobru organizaciju ulaza i prostora između vozila. „Duža“ varijanta je super kad hoćeš zonu za radionicu ili skladište iza auta. Tu se često traže i prozori, ventilacija i pomoćna vrata sa strane.
Cene Montažnih Garaža: Šta Ulazi U Ponudu I Šta Se Doplaćuje
Cena zavisi od sadržaja paketa, ne samo od dimenzija. U osnovi su obično konstrukcija, oplata, krov, jedna varijanta vrata, okovi i završni detalji. Priprema terena, temelj i dodatna oprema često se doplaćuju, pa to razjasni pre naručivanja. Traži ponudu stavku po stavku radi poređenja. Obavezno pitaj za transport, jer isporuka zavisi od prilaza, udaljenosti i uslova na terenu.
Faktori Cene (dimenzije, Krov, Vrata, Boja, Izolacija, Transport)
Najviše cenu pomeraju dimenzije, materijal (profilisani lim ili sendvič panel), zatim krov i vrata. Jednovodni krov je često jednostavniji, dok dvovodni krov zna da bude bolji kad hoćeš prirodnije oticanje vode i „klasičan“ izgled. Boja po standardu boja (RAL) i izolacija takođe utiču, a transport i istovar mogu da budu posebna stavka.
Tipične Stavke Doplate (temelj, Oluci/odvodnja, Prozori, Pomoćna Vrata)
Najčešće doplate su temelj ili betonska ploča, zatim oluci i odvodnjavanje, kao i prozori. Pomoćna vrata su praktična kad ne želiš stalno da otvaraš velika vrata zbog sitnica. U ovu grupu često spadaju i ventilacija, dodatne zaptivke, jači okovi, police ili mala galerija, ako ti treba više mesta.
Priprema Podloge I Temelja Pre Montaže
Dobra podloga sprečava pomeranje i razlabavljivanje posle zime. Teren treba nivelisati, a temelj izvesti tako da se konstrukcija može ankerisati bez uvijanja. Pre dolaska ekipe proveri prilaz kamionu, mesto za odlaganje delova i prostor za rad oko garaže. Ako je lokacija vetrovita ili je zemlja loša, ne štedi na temelju, jer stabilnost je presudna.
Betonska Ploča, Temeljne Stope, Behaton – Prednosti I Mane
Betonska ploča je najstabilnija i najlakša za održavanje, plus olakšava ankerisanje i dihtovanje pri dnu. Temeljne stope mogu da budu dobro rešenje kad je teren nezgodan, ali moraju tačno da se urade i povežu logično sa konstrukcijom. Behaton može da radi posao za lakšu namenu, ali traži dobru podlogu ispod i nije uvek idealan za teža opterećenja i vodu.
Montaža I Rokovi: Kako Izgleda Proces „ključ U Ruke“
„Ključ u ruke“ obično uključuje isporuku, sklapanje, ankerisanje i podešavanje vrata u jednom dogovoru. Proces ide redom: provera mere i podloge, istovar, sklapanje konstrukcije, montaža oplate i krova, pa podešavanje vrata i okova. Ti obezbedi pristup i prostor za rad. Na kraju uradi kontrolu: zategnuti šrafovi, nalegle zaptivke, vrata bez zapinjanja.
Koliko Traje Montaža I Kako Ide Isporuka
Montaža često može da se završi u jednom danu, a kod manjih modela vreme montaže ume da bude oko 90 minuta kad su uslovi idealni i podloga spremna. Ipak, isporuka i istovar znaju da uspore stvar, naročito ako je prilaz uzak ili je teren mekan. Zbog toga je pametno da se unapred dogovori tačan termin i način transporta.
Vrata, Krov I Zaštita Od Korozije (najčešće Opcije)
Vrata, krov i antikorozivna zaštita najviše utiču na svakodnevno korišćenje garaže. Krov može biti jednovodni ili dvovodni, ali odvodnjavanje mora biti dobro, naročito uz kuću ili ogradu. Oluci sprečavaju blato i podlivanje vode. Za metal traži jasno: toplo cinkovanje ili antikorozivna boja u dva sloja, posebno oko spojeva i šrafova.
Dvokrilna, Kip, Rolo/segmentna Vrata
Dvokrilna, odnosno krilna vrata su jednostavna i laka za popravku, ali traže prostor ispred garaže da se otvore. Kip, odnosno kiper vrata (podizna vrata) štede prostor ispred, ali traže dobro podešavanje i kvalitetne šarke i opruge. Rolo ili segmentna vrata su komforna i uredna, ali obično skuplja i osetljivija na lošu montažu, pa tu ne vredi ići na „najjeftinije“.
Zaključak
Najpametnija kupovina kreće od dobrog merenja, jasne specifikacije i realne procene podloge, jer se tu najčešće prave greške. Kada upoređuješ montažne garaže, gledaj komplet: materijal, dimenzije, vrata, krov, zaštitu od korozije i šta tačno ulazi u ponudu. Sledeći korak je da tražiš ponudu po stavkama i da pre montaže obezbediš stabilan temelj, pa si miran.
Ready to see what Writer creates from your keyword?
Generate Free ArticleBUILT FOR REAL WORDPRESS WORKFLOWS
One workflow from keyword to WordPress.
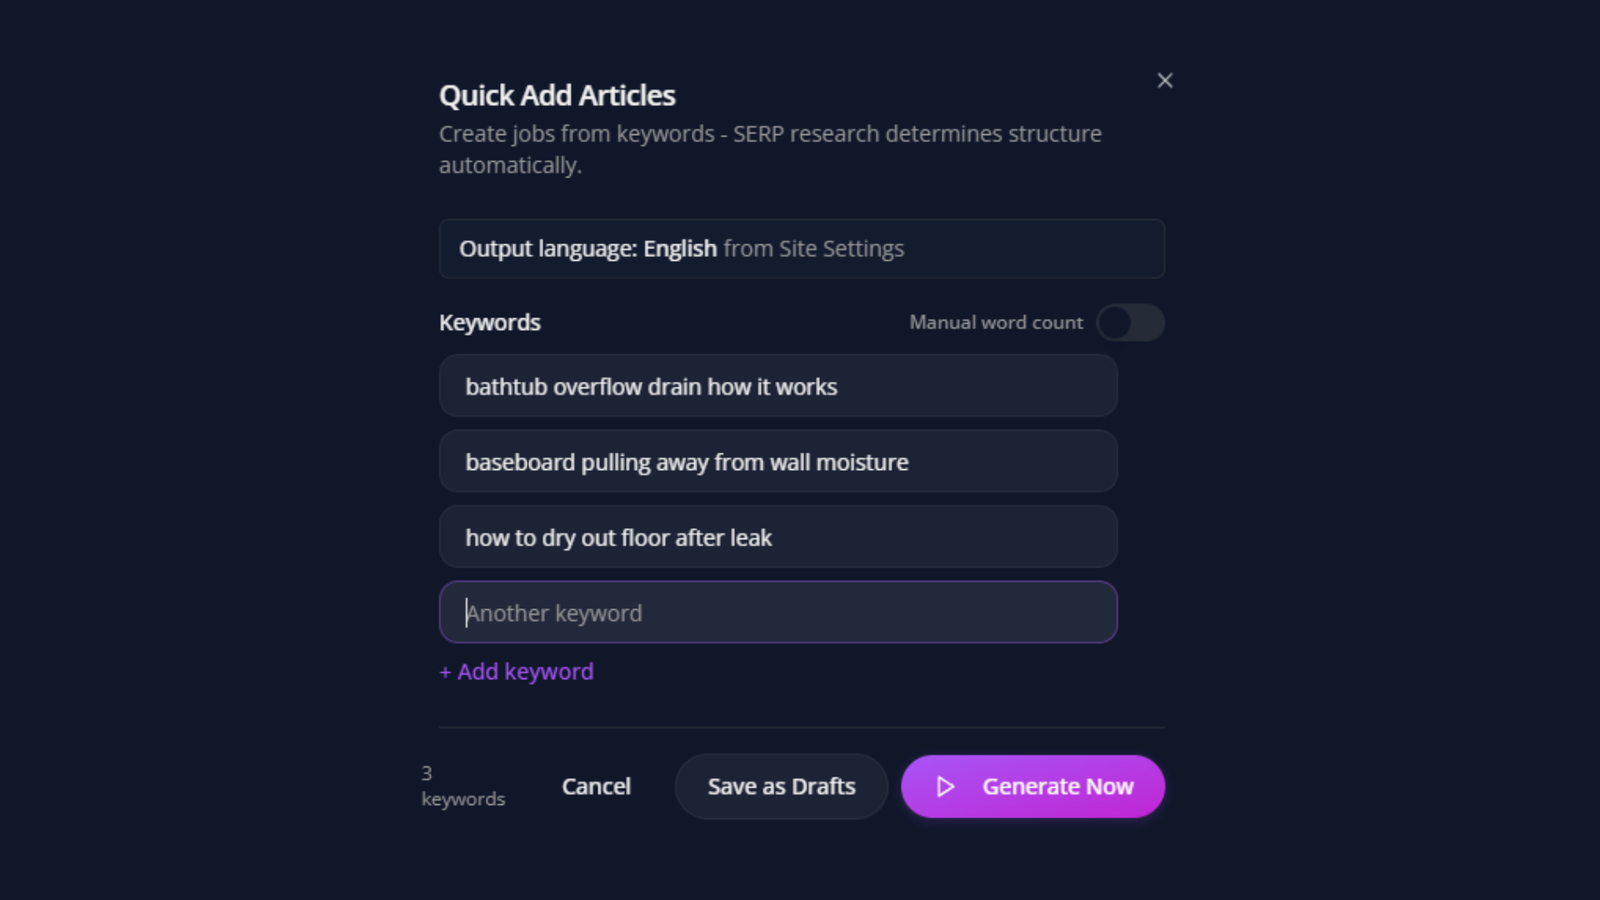
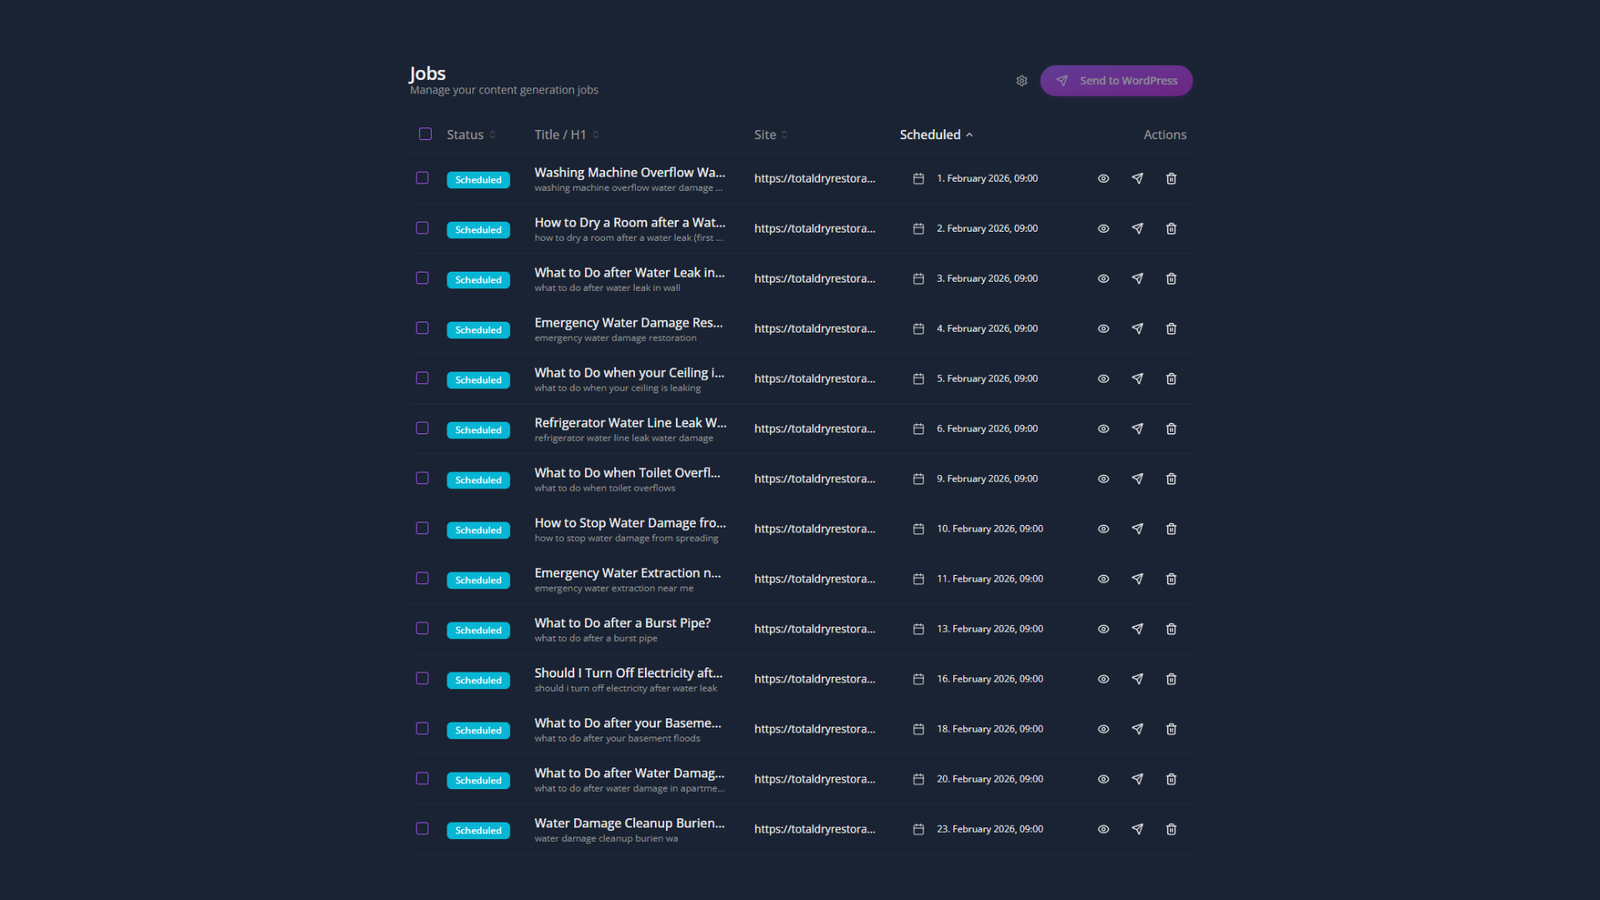
Create one article or import a complete content plan. Writer handles research, drafting, images, links, SEO fields, and quality checks—while you control the final review and publishing.

Included with every article credit
The complete Writer pipeline—not just a first draft.
Search-intent research and content planning
Intent, questions, and competing content are analyzed before drafting.
Article up to 3,000 words
A complete, structured article ready for your review.
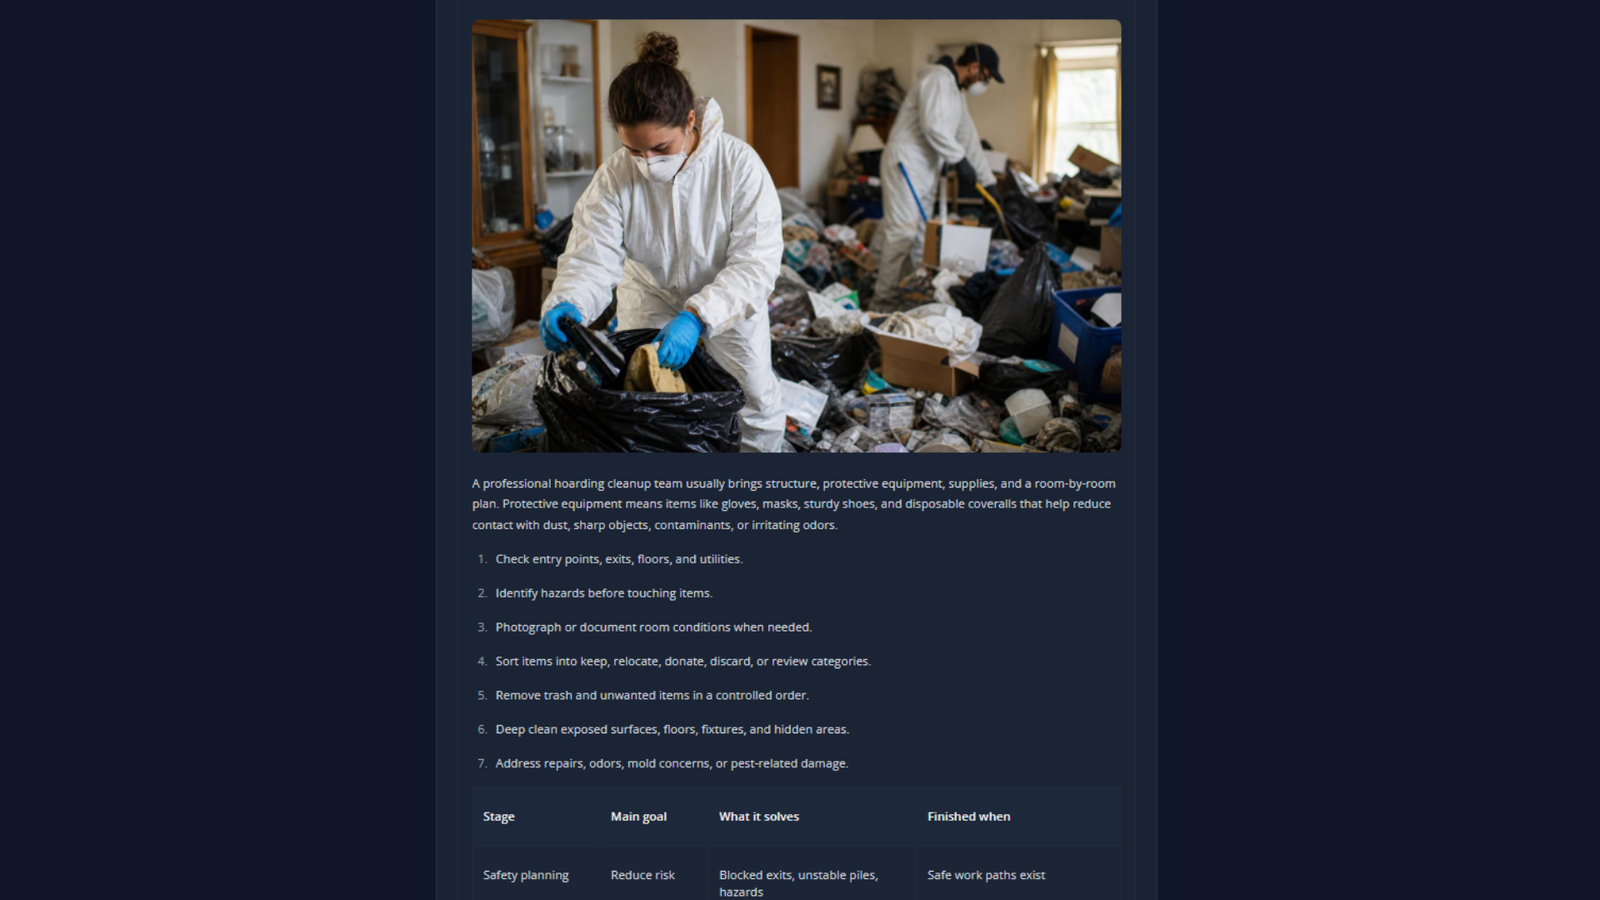
Up to 3 original images
Topic-specific featured and inline images.
SEO title, meta, and structured data
WordPress-ready search fields and schema.
Contextual internal and external links
Relevant link opportunities included in the workflow.
Quality checks and on-demand audit
Review structure, coverage, readability, and SEO details.
WordPress draft, publish, or schedule
Nothing is sent until you approve the final article.