
Read time: 12-15 minutes
What you’ll achieve: A fully connected Aomark account with both Suite and Writer installed on your WordPress site, ready to start optimizing content and producing AI-assisted articles.
What You’ll Need Before You Start
- An active Aomark account (sign up at aomark.io if you haven’t already)
- A live WordPress site with admin access
- A Google account (optional, but recommended, unlocks Google Search Console features in Suite)
How Aomark Works: The Big Picture
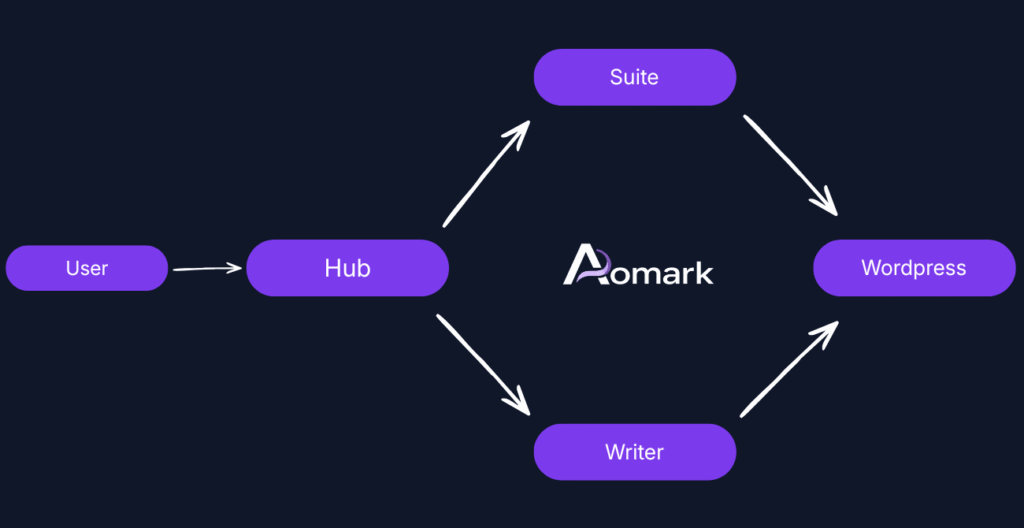
Before diving in, it helps to understand how the pieces fit together.
Aomark runs as two separate WordPress plugins, both connected to your Aomark account at app.aomark.io:
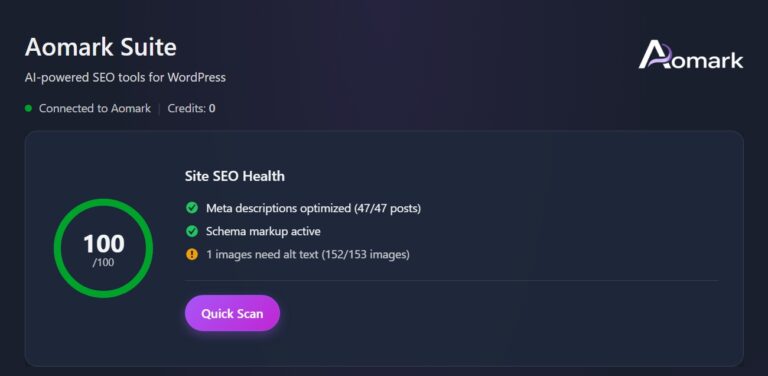
Aomark Suite is your on-page SEO toolkit. It lives inside your WordPress dashboard and gives you modules for meta titles and descriptions, schema markup, image SEO, XML sitemaps, FAQ generation, and Google Search Console integration. You install it once, log in, and your site is connected.
Aomark Writer is your AI content production workflow. It pulls keyword research from your Excel template, lets you build briefs, generates articles with AI, and publishes directly to WordPress. It runs as a separate plugin so it stays modular and focused.
Both plugins talk to your Aomark account in the cloud, that’s where your credits, site connections, and settings live. Neither plugin requires you to enter API keys or manage AI credentials directly. That’s all handled on Aomark’s side.
Step 1: Download Both Plugins from Your Aomark Dashboard
Start at app.aomark.io. Log in to your account and head to the dashboard.
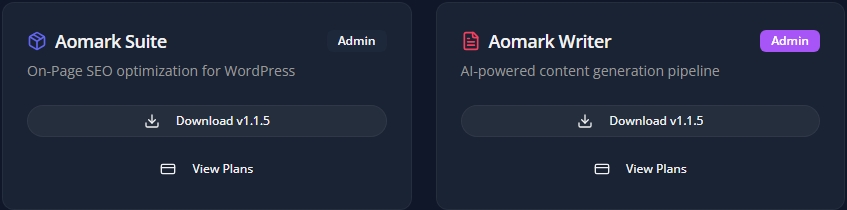
You’ll find the download buttons for both plugins here, one for Aomark Suite and one for Aomark Writer. Download both .zip files to your computer. You don’t need to unzip them; WordPress handles that during install.
Keep both files handy. You’ll upload them to WordPress in the next two steps.
Step 2: Install and Connect Aomark Suite
Install the Plugin
In your WordPress admin, go to Plugins > Add New Plugin, then click Upload Plugin at the top of the page. Choose the Aomark Suite .zip file you just downloaded and click Install Now. Once it finishes, click Activate Plugin.
Connect Your Aomark Account Inside Suite
After activation, find Aomark Suite in your WordPress sidebar and click License.
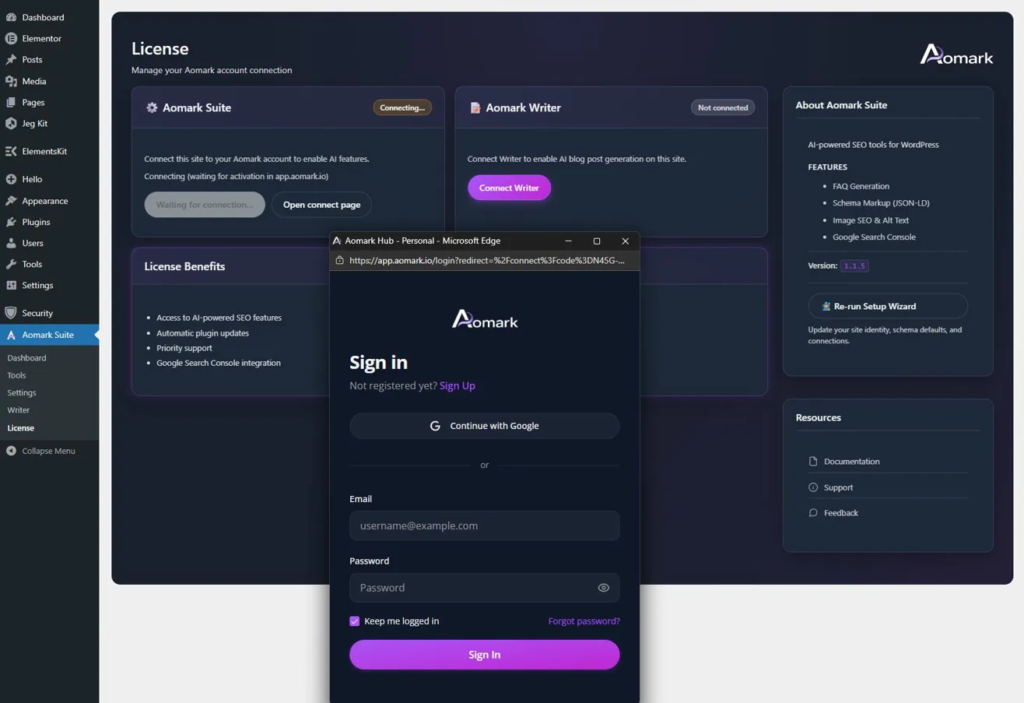
You will see two connection cards side by side, one for Aomark Suite and one for Aomark Writer, both showing “Not connected.”
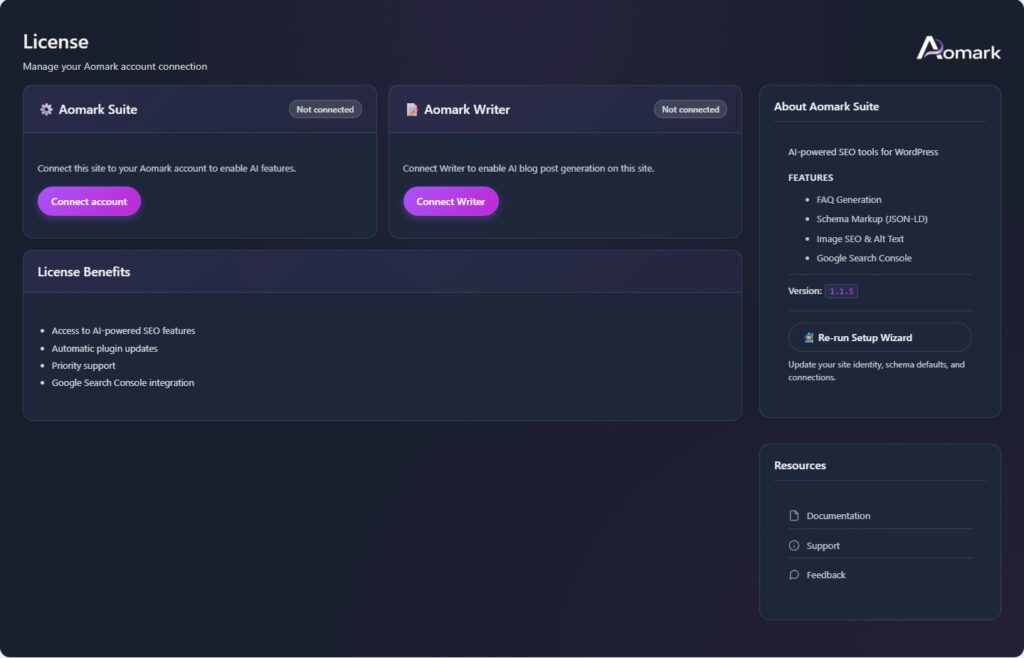
Click Connect account under the Suite card. A popup will appear pointing to app.aomark.io. If you are already logged into your Aomark account, the popup closes automatically and the connection completes in seconds. If you are not logged in yet, the popup will prompt you to sign in first.
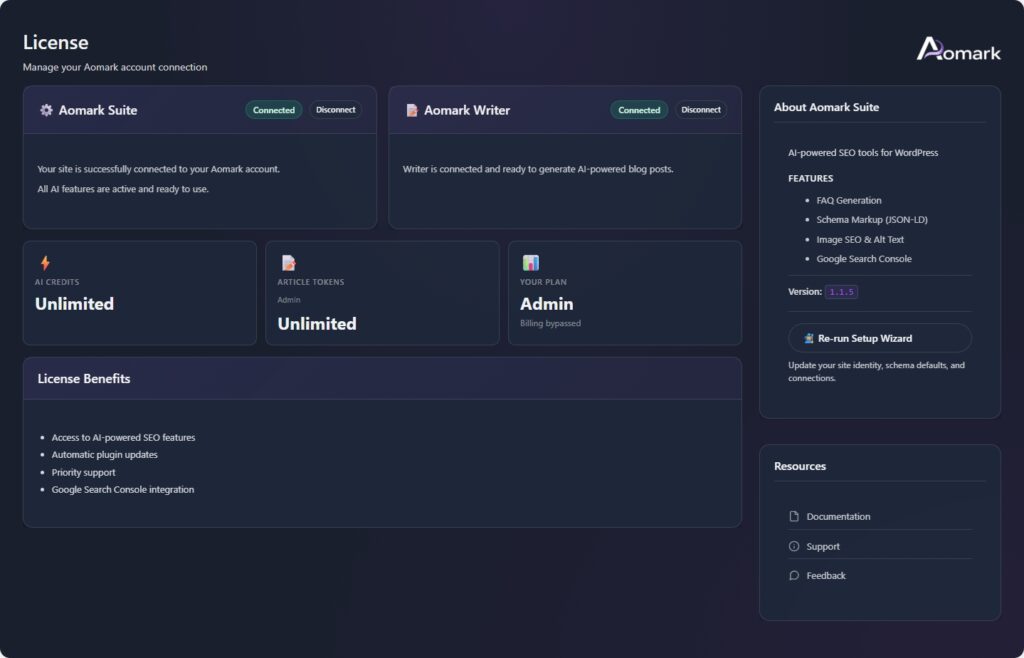
Once connected, the Suite card updates to show a green Connected badge. You will also see your AI Credits, Article Tokens, and plan details appear below.
Your site is now live in Aomark. If you head back to app.aomark.io and check Connected Sites, you’ll see it listed there.
Step 3: Install and Connect Aomark Writer
Installing Writer follows the same process as Suite. Go to Plugins > Add New Plugin > Upload Plugin, upload the Aomark Writer .zip, install and activate it.

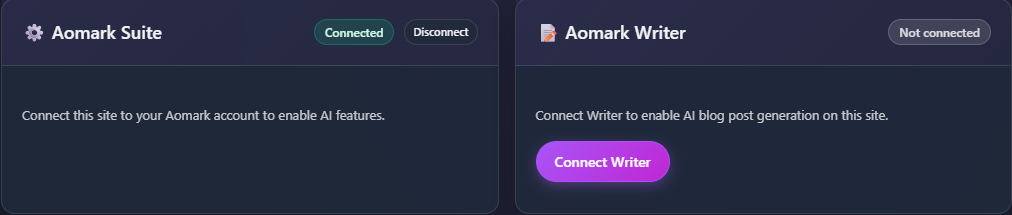
If you have both plugins installed, Writer is managed from the same place as Suite. Head to Aomark Suite > License in your sidebar, you will see the Writer connection card sitting alongside the Suite card. Click Connect Writer and the same popup flow handles the connection.
If you are running Writer as a standalone plugin without Suite, you will find Aomark Writer as its own item in your WordPress sidebar. Click it and you will land on the Writer dashboard showing your Site URL and connection status. Click Connect to Aomark and the popup handles authentication the same way.

Either way, once connected the status updates to show your site as active and Writer is ready to use.
Step 4: Connect Google Search Console (Recommended)
GSC connection is optional, but worth setting up now while you are in setup mode. It unlocks sitemap submission directly from Suite and gives the platform more context about your site’s search performance.
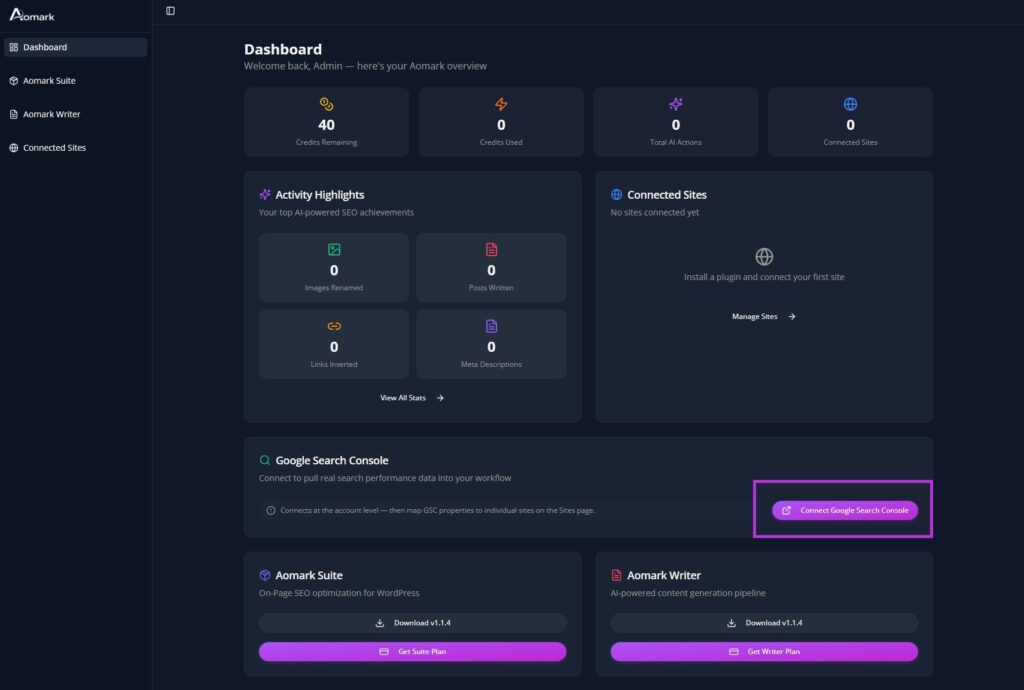
Connection is handled centrally from the Aomark Hub at app.aomark.io, one connection that both Suite and Writer can use rather than connecting separately in each plugin.
Head to app.aomark.io and find the Google Search Console section. Click Connect and follow the OAuth flow, you will be redirected to Google to authorize access, then brought back to the Hub automatically.
Once connected, you will see your Google account and connection date confirmed. Click Map Properties to Sites to link your GSC property to the correct connected site.

💡 Note: If you skip GSC for now, everything in Suite still works. You just won’t be able to submit your sitemap directly from the plugin until you connect later. You can come back and do this at any time from the Hub.
Step 5: Verify Your Setup in the Aomark Hub
With both plugins connected, head back to app.aomark.io and check Connected Sites. You should see your WordPress site listed with both Suite and Writer shown as active.

This is your source of truth. If a plugin ever disconnects or you need to troubleshoot, this is the first place to check.
Take a moment to review your account settings while you’re here, make sure your plan details, credit balance, and billing information look correct before you start using the tools.
What’s Next: Where to Go From Here
Now that everything is connected, here’s the recommended path depending on what you want to do first:
If you want to start optimizing your existing content with Suite:
Head into the Suite dashboard and work through the core modules. A good starting point is meta titles and descriptions, quick wins that have an immediate impact.
→ See: On-Page SEO Workflow with Aomark Suite (Guide 2)
If you want to start producing AI content with Writer:
Download the Aomark Excel keyword research template from the Writer section in app.aomark.io, fill in your keywords and research data, then import it into Writer to create your first brief.
→ See: AI Content Production Workflow, From Keyword Research to Published Article (Guide 3)
If you want to learn each Suite module in detail:
Check out the Suite tutorial series, there’s a short tutorial for every single module covering exactly how to use it step by step.
→ See: Suite Tutorials
Quick Setup Checklist
Use this to make sure nothing was missed:
- Aomark account created and active at app.aomark.io
- Aomark Suite .zip downloaded from the dashboard
- Suite installed and activated in WordPress
- Logged in to Suite with your Aomark credentials, site showing as connected
- Aomark Writer .zip downloaded from the dashboard
- Writer installed and activated in WordPress
- Logged in to Writer with your Aomark credentials, site showing as connected
- (Optional) Google Search Console connected inside Suite
- Both plugins visible as active in app.aomark.io Connected Sites
Troubleshooting
Plugin won’t activate after upload
Make sure you’re uploading the .zip file directly without unzipping it first. If you get a “destination folder already exists” error, deactivate and delete any older version of the plugin before uploading the new one.
Login screen says credentials are incorrect
Double-check you’re using the same email and password as app.aomark.io. If you’re unsure, reset your password from the Aomark login page and try again.
Site not showing in Connected Sites after login
Try refreshing app.aomark.io. If it still doesn’t appear after a minute, log out of the plugin and log back in, this triggers the connection sync.
GSC connection drops back to unauthorized
This is usually a browser cookie issue during the OAuth flow. Try connecting in a private/incognito window, or temporarily disable any browser extensions that block third-party cookies.
Last updated: February 2026